150mm Istar / PST Build
i became interested in the Istar objectives after seeing solar images taken by "JP" from France with his 230mm Istar / PST . A 2300mm long scope would be more that I would want to handle so I opted for the 150mm / 1500mm F/L combination .
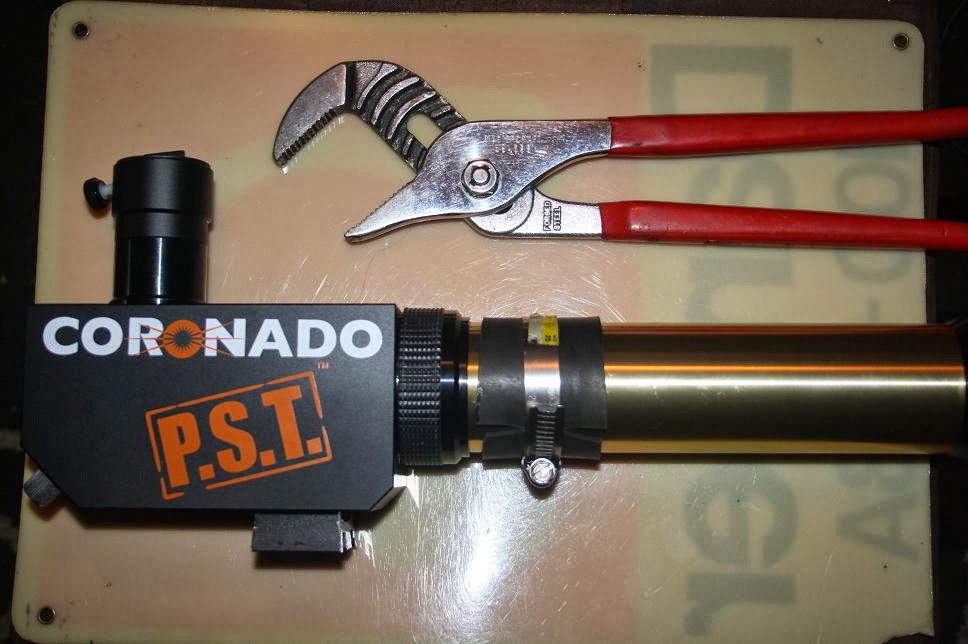
I had 2 scopes left over from previous solar experiments that I could combine into 1 long OTA . The scope I used for the objective end was an old Apogee 127mm acro . This one has a dew shield that was slightly larger than the 150mm I needed to mount the Istar objective . For the back end of the scope I decided to use the tube from my original Celestron XLT 102 mod , this one already had an adapter made for the back end to accept the PST etalon and focuser assembly .
Next I lay'd everything out on the floor and simulated the light cone using 2 tape measures . From this I could verify that the light cone would clear the steps in the various diameter tubes and also determine the location for the internal 100mm Lunt ERF
Next I had to source some aluminium to make a ring to mount the objective to the dew shield . I was lucky to find a place willing to slice me a couple of rings from a heavy wall aluminium pipe .
Here is the finished ring with the objective mounted to the dew shield
Now I needed a way to mount the Celestron 102 tube squarely into the Apogee 127 tube . For this I made a PVC ring nut to thread on to the tube where the 102 objective was once mounted , this ring fits the 127 tube and keeps the two tubes aligned and also acts as a baffle . To lock this into position I made a flange with 3 mounting screws and an additional 3 set screws to allow me to adjust the overall length of the OTA
The lens cell for the old Apogee was just plastic and the dew shield just slid on . This was nothing that I would want to trust but would be sufficient for testing the scope . This is the scope loaded on my Losmandy GM8 for the initial test .

The initial testing was very positive as far as the scope was concerned but also suggested that my mount was struggling with this load . One thing always seems to lead to another in this solar game so the solution was to look for a bigger mount . As you can see from the pic there was also an issue of the tripod legs interfering with the scope . I was able to find a nice gently used EQ6 Pro mount on a column type base and solved the mount issue . This left 2 more things to do to complete the scope . First I replaced the plastic lens cell that was joining the dew shield to the 127 tube with another machined aluminium ring so now all the tubes are firmly held together and aligned . Last but not least was a paint job to give it a more professional look and get away from the cobble scope look .
Here is the completed scope on the new mount , I am very pleased with how this project turned out and have been posting the initial images from it on the blog .
There will be one last thing I will add to this scope and that will be a remote drive for the etalon . The focuser I use on this scope is a Moonlight DC motorized focuser . The hand control has 2 channels so I have ordered another motor that I will adapt to adjust the etalon , this will put my focus as well as etalon adjustment on the same hand control .
Any questions or comments are always welcome .
SkyWatcher 100 Pro Fluorite ED APO / PST Mod
This is my second mod and for this one I used a higher quality donor . I picked up a second used PST a while back and decided to use the motorized Moonlight focuser from my SM 60 II for this mod . For the scope I removed the focuser and made an adapter for the end that could lock the "gold tube" into.
Next I removed the aperture from the gold tube and made another adaptor to mount the etalon to the Moonlight .focuser . When I am sure of the best etalon position I will make a proper length tube to replace the gold one .
The last thing to do was to make another ERF cell to fit this scope , similar to what I made for the XLT mod below only bored to fit this scope .
I have a SM 90 II etalon on order for this scope so stay tuned for part 2 of this new adventure !
First Light Images from this scope can be found in the March 17 2014 blog post
First 102 XLT / PST Mod
These mods are very similar and I have followed the people who have gone before me with this . There are 2 key elements that need to be followed ,
1) the "donor" scope must be as close to F 10 as possible to match the optics in the PST etalon
2) the etalon needs to be placed 200mm into the optical path .
The required pieces are a PST , an F 10 donor scope , an Energy Rejection Filter. (ERF) and a larger blocking filter for a stage 2 Mod .
I did try the stage 1 mod which uses the PST black box and blocking filter but found the 5mm BF in the PST to be too restrictive and will not recommend it .. Everything here relates to a stage 2 PST mod .
ERF CELL
I prefer the way Bill mounted his ERF cell directly to his objective lens cell because there is no chance of forgetting to mount the ERF before using the scope . When I did mine I made a separate cell to mount on the end of my XLT . This is how I did mine but would strongly recommend mounting it in a more permanent fashion as Bill has done , I will be changing mine soon .
I used an off the shelf PVC drain pipe fitting . The glass ERF fit perfectly so I just machined the fitting to fit the end of my scope and trimmed off the excess material , here is how I made the ERF cell .
The Fitting
After machining ready for assembly
ERF assembly mounted to XLT
Next the PST will have to be disassembled , loctite is often used but can be overcome . I used rubber and hose clamps to grip the pieces without marking them . All that is used is the PST etalon .
What is required next is a way to adapt this etalon into the donor scope . Antares makes a 2" twist lock extension that can work well for this . The 2" socket end of this extension is a direct fit to the etalon . The nose piece of this extension is too small to fit the other end of the etalon . For Bill I made an adaptor ring to match the 2 threads . For my etalon I used the nosepiece from a cheap 2" eyepiece I was not using
Now the etalon needs to be positioned 200 mm into the optical path . This scope is 1000mm FL so converting this it works out to close to 31 1/2" from the objective . As you can see from this picture the supplied focuser is too long . My 2 options were to either cut the tube and use the supplied focuser or use a low profile focuser . I all ready had a low profile focuser so I adapted it to the XLT and my etalon placement is correct . And the BF 15 works well with this combination .
UPDATE
Although the above did work we found out that it is much better to leave the etalon positioned at or close to 200mm into the optical path and do all focusing adjustments behind the etalon . To achieve this I shortened the XLT tube by 3" and reinstalled the original focuser to use to position the etalon .
The other change I made was to mount a Moonlight focuser to the etalon . This allows me to focus now without disturbing the etalon position .